
Account setup
This section will guide you through creating your Deriv account and seamlessly registering your application.


Create a Deriv account
- Visit api.deriv.com
- Click Sign Up on the top right corner of the page.
- Provide your Email Address.
- Check your inbox for a verification email and click the link to confirm your account.
- After verifying your email, provide your Country of residence, Citizenship, and create a Password.
- Your Demo account is now active — you can start building and testing your apps right away.
- To create a Real account, click Complete my profile.
- Choose your Account Currency, fill in your Personal and Address details, and accept the Terms of use to proceed.
- Your Real account is now active — you’re eligible to earn markup commissions on your app.
Note:If your country of residence is one of the supported countries for Wallets, you will also receive a virtual Wallet (demo) account. Once you complete the real account creation process, a real Wallet account will also be created, based on the currency you select.

Attention Developers – Wallet Accounts Can’t Trade!
If your account type is CRW (Wallet) or VRW (Virtual Wallet), you cannot perform trading transactions via API.
To continue using the API for trading operations (like buy, proposal, etc.), please follow these steps:
1️⃣ Create a real trading account (CR) on
Traders Hub.
2️⃣ Use that CR account when generating your API token.
How to add or select your real trading (CR) account
To use the Deriv API for trading and earn markup commission, you must have a CR (real trading) account. Here’s how to check or create one:
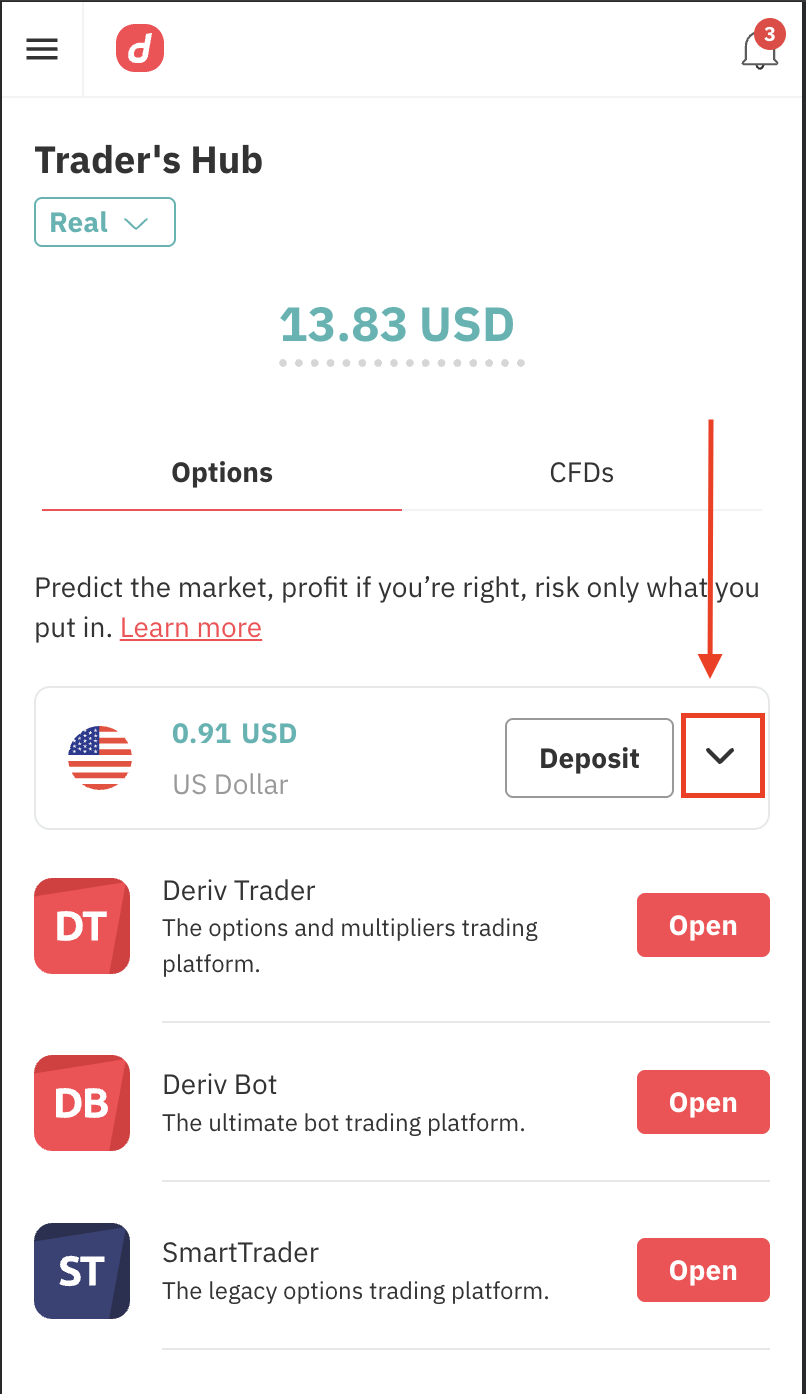
Step 1
Open the account switcher
Click the dropdown next to your balance to view all available accounts.
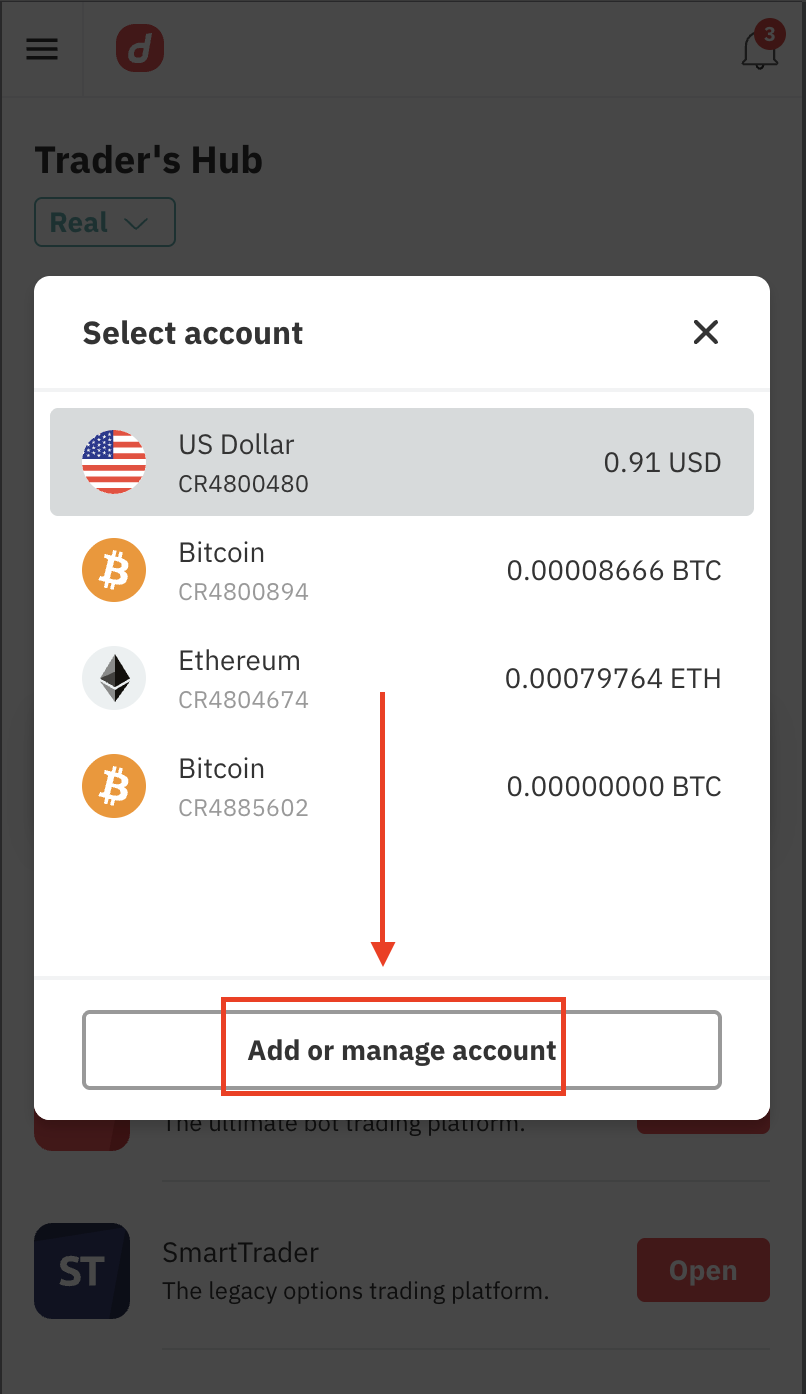
Step 2
Manage your accounts
Tap "Add or manage account" to open or switch to a trading account (CR).
Step 3
Choose your currency
Select the "Fiat currencies" tab and pick your preferred currency to open a CR account.
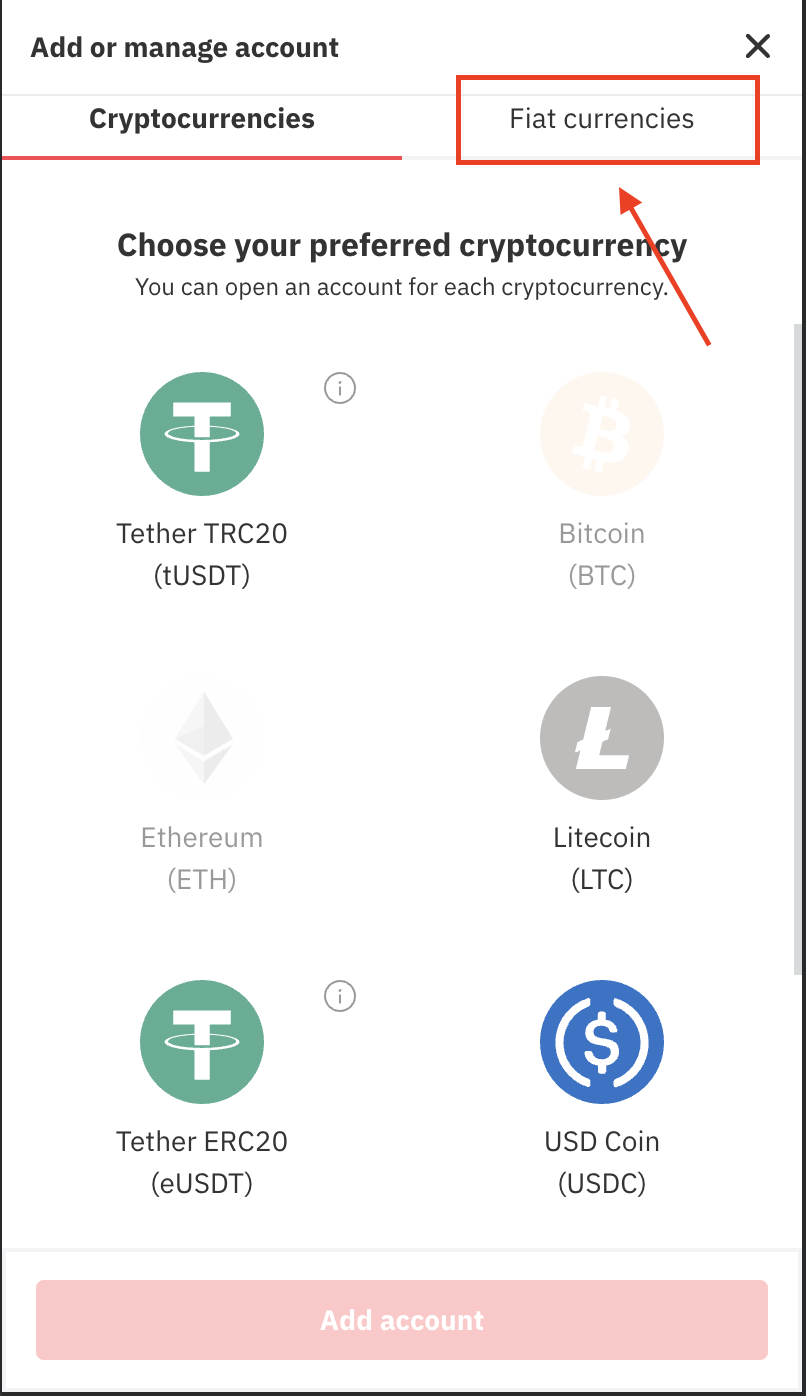
Once created, your CR account (e.g. CR12345678) will be ready to use with API tokens for trading actions like buy, proposal, etc.
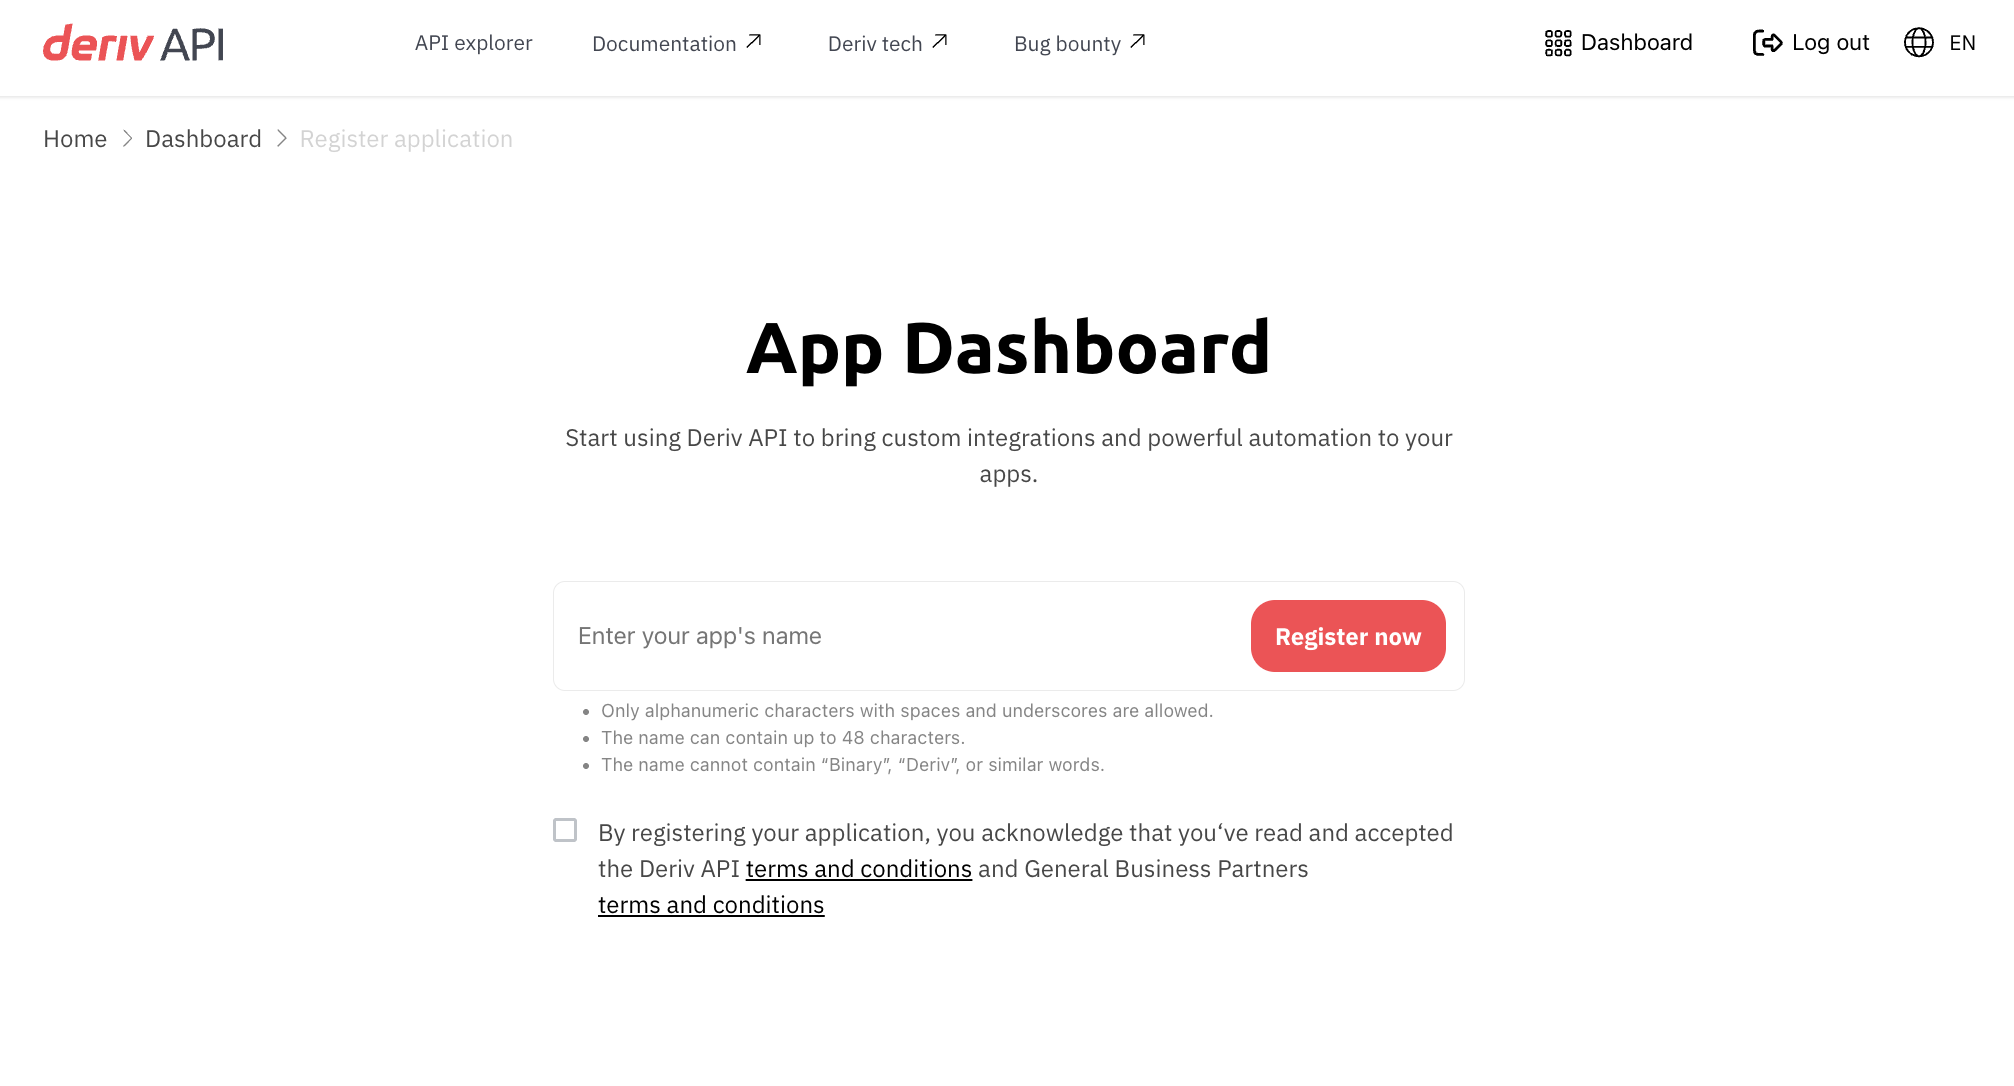
Register your Deriv application
First-time app registration
- Open the Dashboard which will take you directly to the Register application screen.
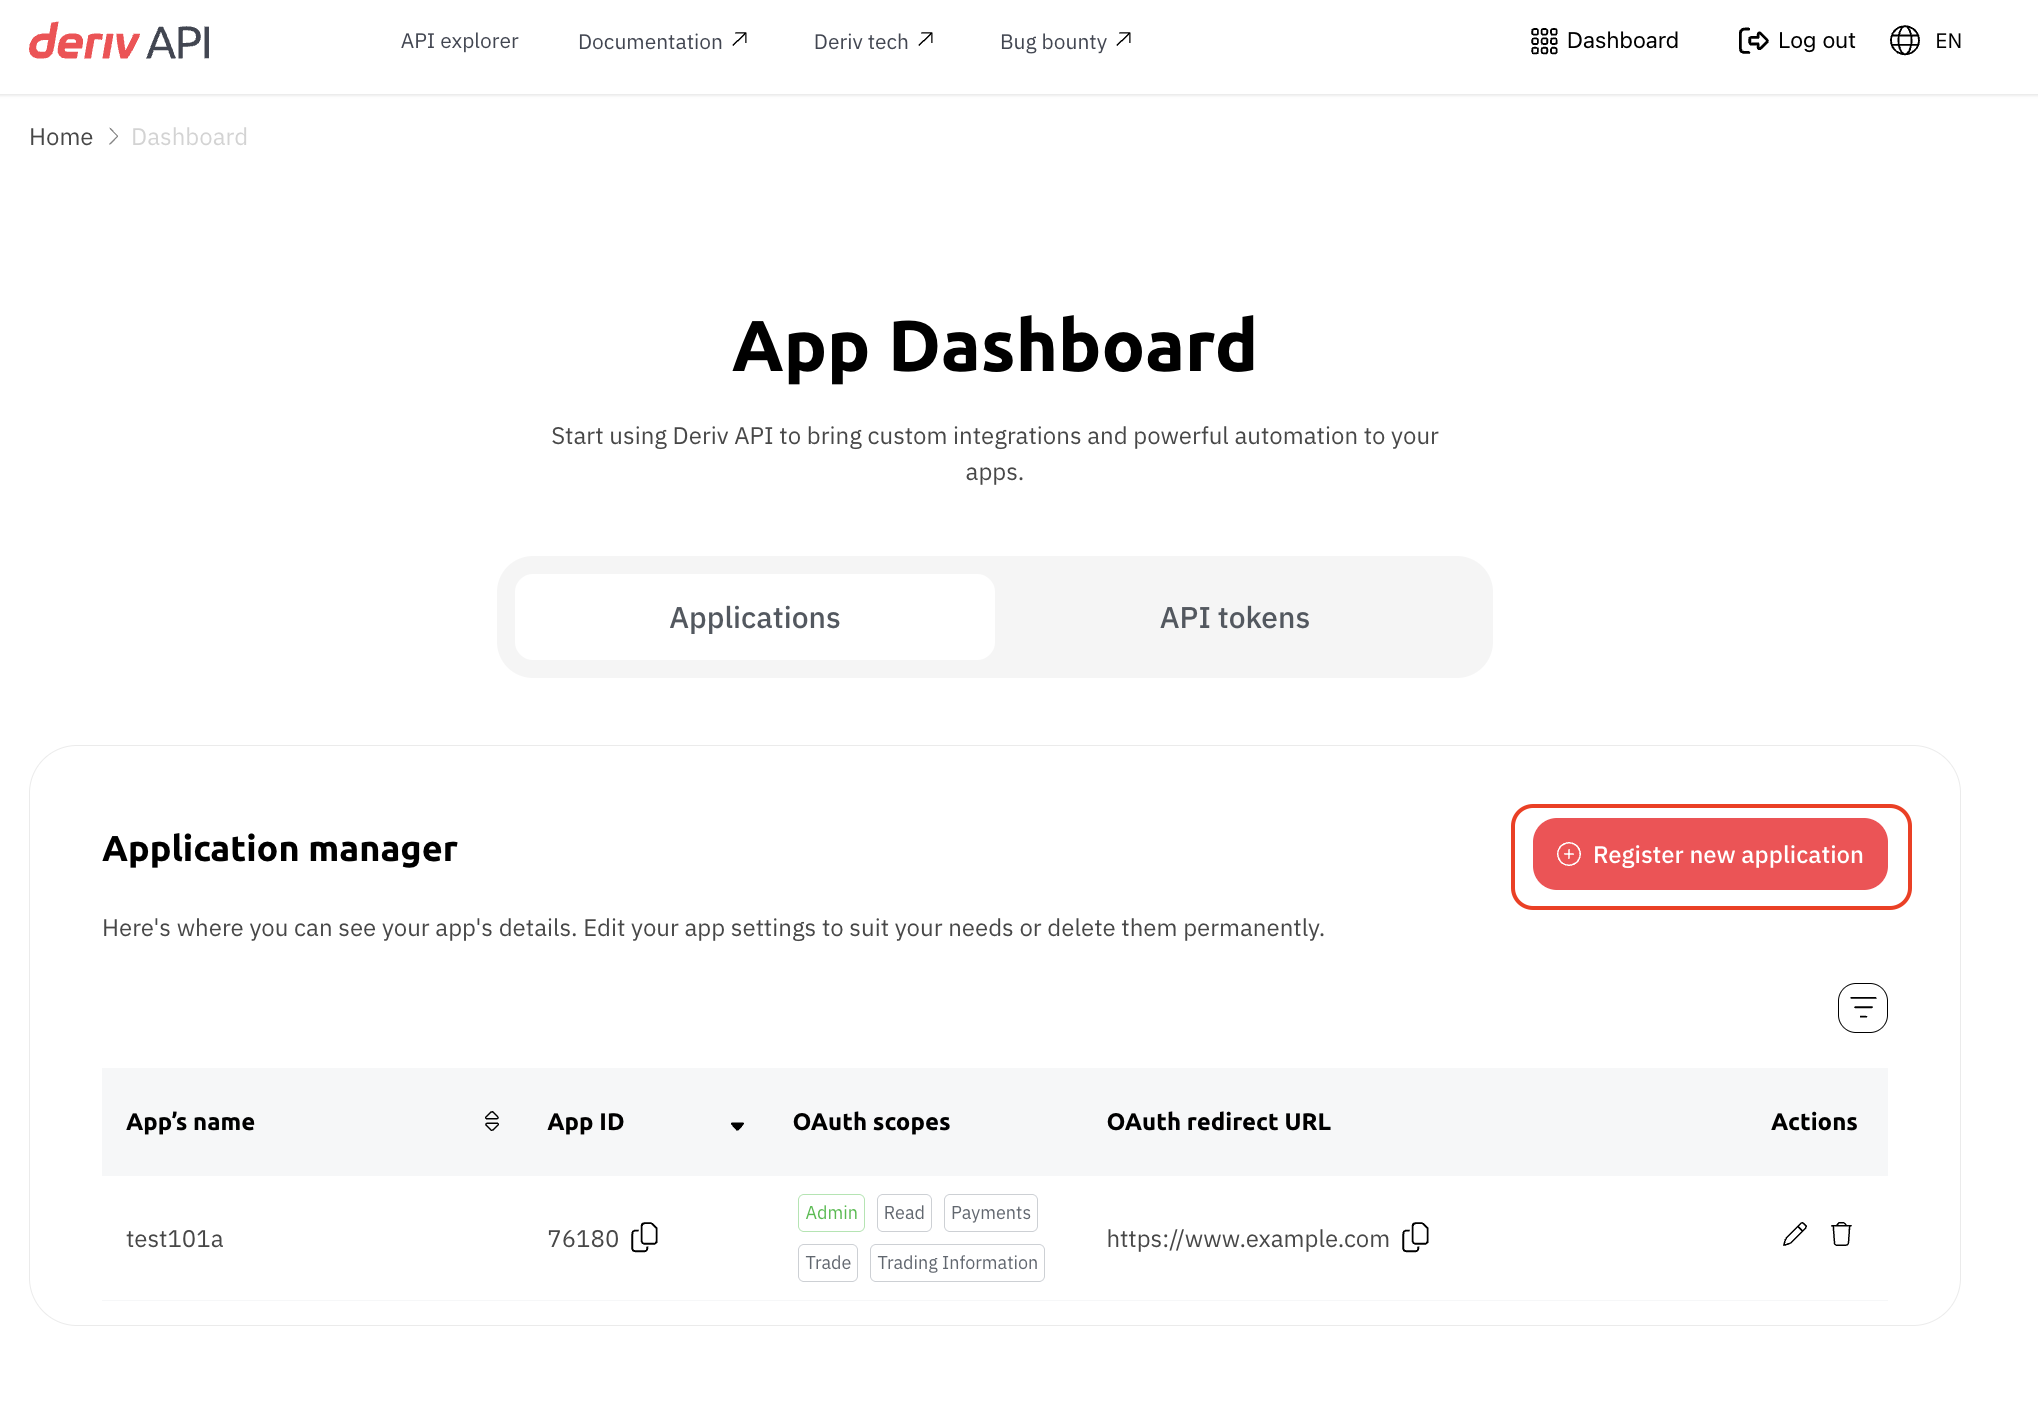
To create additional apps
- Open the Dashboard and go to the Applications tab.
- Click Register new application to create a new app.
Register a new application
-
Provide a name for your application and accept the Terms and conditions.
-
Configure your application:
-
Add your markup fee percentage.
NoteMarkup is the commission added to the trade price to earn additional income.
Learn more about markup calculation here. -
Fill in your OAuth details:
- Redirect URL – Allows users to log in to your app using their Deriv accounts without using an API token.
- Verification URL – Used for email verification. If provided, a link with a verification token will be sent to the user’s email. Otherwise, the Redirect URL is used.
Example: If your domain ishttps://example.comand your verification endpoint is/verify, the full URL would be:
https://example.com/verify - Select the required Scopes of authorization and click Create.
-
Your app will now appear in the Application Manager under the Applications tab.
To update an existing app
-
Open the Dashboard and go to the Applications tab.
-
Click the pencil icon
 next to the app you want to edit.
-
You can update the App name, Markup fee percentage, and OAuth details as needed.
Create an API token
-
Open the Dashboard and go to the API tokens tab.
-
Click Create new token from the left panel.
-
Select the account type for which you want to generate a token.
ImportantTo use the API for trading operations (like buy, proposal, etc.), use your real trading account (CR).
-
Choose the required access level (scopes):
-
Read – View market data and account information.
-
Trade – Full access to trade, manage funds, and sensitive data.
-
Payments – Enables withdrawals to payment agents and inter-account transfers.
-
Trading Information – View trading history.
-
Admin – Full access to account settings, token usage, and account management.
Not recommendedThe Admin scope gives extensive access to all account functions and should only be used when absolutely necessary. Make sure the token is stored and used securely.
-
-
Enter a descriptive name for your token.
-
Click Create token to generate the token.
-
A confirmation pop-up will appear — “Token created successfully.”
Make sure to copy and save the token key now.
ImportantFor security reasons, the token cannot be viewed or copied again.
If you lose the token, you’ll need to create a new one.
Updated 3 months ago